
A good, rich, dark and sometimes boozy Christmas Fruit Cake is a must-have on every Christmas platter. Studded with dry fruit soaked in rum and spiced with beautiful holiday flavours, this recipe is sure to win you over.

In most Christian homes along the south west coast of India, a good Dark Fruit cake makes an appearance at Christmas and all special occasions like engagement parties, weddings, anniversaries, Communion celebrations and so on. It also holds a very prominent spot on a typical Christmas platter, or what is locally referred to as a Kuswar platter. (Kuswar=Christmas sweets)
Most people I know enjoy a good fruit cake, but very often, find it too tedious to make one at home. They settle for a commercially made cake, which very often has a number of additives including caramel colour to give it a deep, dark colour.
Today, I’m sharing with you, my favourite Fruit Cake recipe. This recipe is a little longer than most other cake recipes. However, I can assure you it is a fairly simple process and the end result is so good, it’s well worth all the extra effort. To help make the process easier, I’ve broken this recipe down into a few parts. Some of them can actually be done days before you’d like to bake this cake. The best part is, this cake tastes best if it’s allowed to rest for a couple of days, so it’s a perfect one to make ahead.
Step 1 – Soaking the fruit
This recipe calls for 500gms of mixed dry fruit. In my assortment, I’ve used raisins, sultanas, currants, mixed peel, candied / glacéd cherries and candied ginger. You can use any dry fruits of your choosing, in the proportion you’d like them. It just needs to add up to about 500 grams all together.

Chop the larger pieces of fruit down to make slicing your finished cake easier. Doing this also makes for a better eating experience, in my opinion. Place all the fruit in an airtight glass jar, top it off with some rum and set it aside in a cool dark place. The fruit needs atleast 24 hours to soak and rehydrate. The longer is steeps in the rum, the better the results. This can be done upto a year in advance.

Step 2 – Making the caramel
The 2nd step is making the caramel. There are many ways to make a caramel. For this recipe, you’re looking for one that gives you a slightly more fluid consistency. I’m using a 2:1 ratio – 2 parts sugar to one part water and I find that this gives me the perfect results for this recipe. You can make this caramel even a few days before you want to bake your cake. Simply let it cool down completely and store in an airtight glass jar. If you’re making this the caramel, the day that you’re baking the fruit cake, make sure the caramel has cooled down completely before you add it to the batter.

Step 3 – Making the cake
Making the batter is a very simple process. It’s just like making any other cake. You need to ensure all your ingredients are at room temperature. In this recipe, I’m using dark brown sugar to help lend a darker colour to the cake. If you can’t find dark brown sugar, regular white sugar will work too. Just make sure you use a fine grain sugar or simply powder your regular white sugar before adding it to the batter.
Sometimes, you find that the fruit in a fruit cake like this one isn’t evenly distributed. Mix the fruit into the flour – baking powder mix to ensure that the fruit doesn’t sink to the bottom of the cake.
Also, in this recipe, I’m using treacle to darken my cake and give it an added boost of flavour. If you can’t find treacle, use some molasses instead. I’m not using any artificial colours. A lot of the commercially available dark fruit cakes use caramel colour. If you’d like to, you can add some to the batter.


I’m going to feed this cake only once with some dark rum, just as it comes out of the oven. This will help the cake soak up all the rum.

While you can cut into the cake as soon as it cools dow, for best results, I recommend atleast letting it stand overnight before you cut into it.
Once all the Hard Yakka’s out of the way, sit back and enjoy your stunning Fruit Cake.


Christmas Fruit Cake
Course: Cakes, Cakes, Cookies & Desserts, RecipesDifficulty: Medium1.8
kilos50
minutes45
minutes24
hours (min)This rich, dark and boozy Christmas Fruit Cake is studded with dry fruit and is beautifully spiced to make it the perfect cake for the Holidays.
Ingredients
- For soaking the dry fruit –
100g sultanas
100g raisins
100g currants
100g mixed citrus peel
50g candied / glaced cherries
50g candied ginger
240ml dark rum
- For the caramel –
1 cup sugar
1/2 cup hot water, from a recently boiled kettle
- For the cake –
200g butter, at room temperature
200g dark brown sugar
4 eggs
1 tsp Vanilla bean paste / vanilla extract
2 tbsp Treacle
120ml Caramel (recipe included)
Zest and juice of 1 orange
250g all purpose flour
1 tsp baking powder
1 tsp ground cinnamon
1/2 tsp ground ginger
1/4 tsp ground nutmeg
1/8 tsp ground cloves
Dry fruit, previously soaked as per directions below.
50g cashew nuts, chopped
45ml dark rum
Directions
- Soaking the fruit –
- Chop all the dry fruit into smaller pieces. I try and keep them evenly sized, like the size of the currants, which are the smallest in the assortment.
- Place all the chopped fruit in an airtight glass jar. Top with rum. Mix well. Cover and steep for a minimum of 24 hours in a cool, dry place. You can leave this fruit to steep for upto a year. Shake the jar or stir the ingredients every once in a while.
- For the caramel –
- Place 1 cup sugar in a large vessel. Let it melt and caramelise on medium heat till all the sugar has dissolved. Do not stir the sugar. Swirl the pan, as needed.
- Once all the sugar has completely dissolved and it caramelised, pour 1/2 cup hot water down the side of the vessel. It is important to do it in this manner to prevent the caramel splashing on you.
- Let it heat through for about another 10 seconds or till both liquids have mixed well. Give it a light stir to ensure they have mixed through.
- Set this aside and leave to cool completely before adding to the cake batter.
- If you’re making the caramel ahead of time, after is had completely cooled, store in an airtight glass jar in a cool, dry place.
- To make the cake –
- Mix the flour and baking powder in a bowl to combine well.
- In a larger bowl, place the soaked dry fruit after draining out any excess rum. Do not discard this rum. You can top the jar up with more fruit and rum and leave to steep for the next time you make this cake.
- Add the cashewnuts to the fruit and mix well.
- Add the flour and baking powder mix to the bowl and mix the flour and fruit thoroughly, and stir through to break up any larger clumps of fruit.
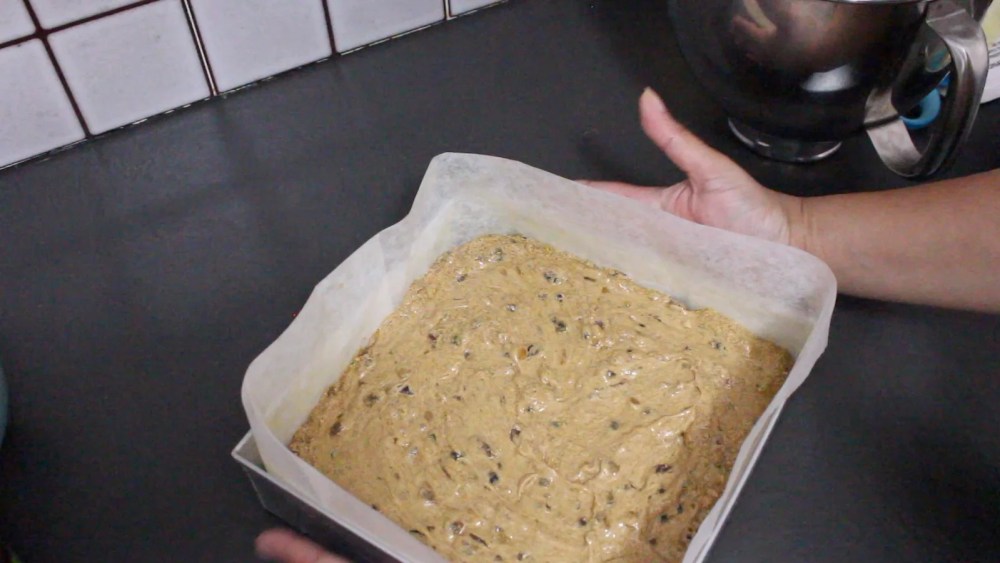
- Preheat your oven to 170C and line a 9 inch square cake tin with baking paper and grease it.
- In the bowl of your stand mixer, place the butter and brown sugar and beat till it is light and creamy and all the sugar has dissolved.
- Add the eggs, one at a time, mixing between each addition.
- Add the vanilla, orange zest and juice, caramel, treacle and all the ground spice powders. Mix well till combined.
- Lastly, add the fruit – flour mix and fold it into the cake batter.
- Bake for 40-45 minutes or till done.
- Immediately, pour the rum all over the top surface of the cake.
- Let the cake cool down in the cake pan itself.
- When it has completely cooled, it is ready to serve or store. For best results, let it rest overnight before cutting. Store carefully wrapped in a couple of layers of baking paper.
- When you’re ready to serve, cut into slices or bars and enjoy!
Recipe Video
Notes
- Make sure all ingredients are at room temperature.
- The fruit should be soaked for a minimum of 24 hours or upto one year in an airtight glass jar. The longer they steep, the better.
- Make sure the caramel has cooled down completely before adding to the batter. The caramel can be made a few days ahead. Simply let it cool down completely and store in an airtight glass jar till ready to use.
- For best results, let the cake rest atleast overnight before cutting into it.
Gingerbread Fudge – a quick and easy recipe

Today’s Gingerbread Fudge is a great recipe to have on hand for Christmas. It is quick and easy, and results in a creamy fudge that is beautifully spiced with all the Christmas flavours. So if a combination of white chocolate and the flavours of a traditional gingerbread is your thing, stick around for the recipe.
With Christmas fast approaching, a lot of folks have started with all kinds of prep work. From deep cleaning and decorating their homes, shopping for the Holiday season and planning their social calendars, most houses see frenzied levels of activity at this time of the year. It’s because of this, one needs to have a few easy and delicious recipes to fall back on.
This gingerbread fudge recipe ticks all those boxes. With prep and cook time of mere minutes, the hardest part of this recipe is leaving the fudge alone, to cool and set. Sounds perfect, right? Well, it is. And you’re left with a nice batch of fudge that just melts in your mouth.
And if you’re in the Southern Hemisphere like I am, we’re headed straight for summer. And it gets really hot here in Sydney. So while everyone in the North is baking up a storm, these kind of recipes work out perfectly for us. This way we get to enjoy those beautiful flavours of Christmas without having to turn the oven on.
This fudge can be made a few days ahead. Store it in the fridge in an airtight container lined with baking / parchment paper. I suggest placing a piece of baking / parchment paper between layers as well, to prevent the pieces of fudge from potentially sticking to each other.
Now, if dark chocolate is more your thing, check out my Dark Chocolate and Hazelnut Fudge recipe. It is absolutely divine.
The ingredients –
This list is an easy one to get a hold off. You will need condensed milk, white chocolate, vanilla, molasses, ground spices (ginger, cinnamon, cloves and nutmeg) and don’t forget the butter.


Let’s get cooking –
Line a 9×9 inch cake pan with some foil, leaving a little overhang to help take the fudge out once it has set. Set this aside to use later.
Place the condensed milk and butter in a heavy bottomed pan on a medium low heat.
Add the molasses and vanilla. Mix through and add the white chocolate. Stir well to help the chocolate pieces melt.
Next, add the spice powders and stir well to incorporate.
Once all the chocolate has melted and the spice powders have been incorporated thoroughly, pour out onto the lined cake pan. Tap the pan gently a couple of times to get rid of any air bubbles.
Leave it on the kitchen counter and let it come to room temperature.
Refrigerate for 4-6 hours or overnight to set completely.
Cut into squares and serve.


Gingerbread Fudge – a quick and easy recipe
Course: DessertCuisine: AmericanDifficulty: Easy49
pieces5
minutes5
minutes4-6
hoursThis Gingerbread Fudge recipe is quick and easy, and results in a creamy fudge that is beautifully spiced with all the Christmas flavours.
Ingredients
30g butter
1 tin condensed milk (395g)
350g White chocolate
1 tsp Vanilla extract / Vanilla bean paste
1 tbsp Molasses
1 tsp ground ginger (powder)
1 tsp ground cinnamon (powder)
1/8 tsp ground cloves (powder)
1/4 tsp ground nutmeg (powder)
Directions
- Line a 9×9 inch cake pan with foil, leaving a little overhang to help take the fudge out once it has set. Set this aside to use later.
- Place the condensed milk and butter in a heavy bottomed pan on a medium low heat.
- Add the molasses and vanilla. Mix through and add the white chocolate. Stir well to help the chocolate pieces melt.
- Next, add the spice powders and stir well to incorporate.
- Once all the chocolate has melted and the spice powders have been incorporated thoroughly, pour out onto the lined cake pan. Tap the pan gently a couple of times to get rid of any air bubbles.
- Leave it on the kitchen counter and let it come to room temperature.
- Refrigerate for 4-6 hours or overnight to set completely.
- Cut into pieces and serve.
Recipe Video
Notes
- Line the cake pan and assemble your ingredients before you start cooking the fudge.
- If you don’t have access to molasses, you can use a little melted down Goan coconut jaggery.
- Adjust the spice powder amounts to suit your liking.
- Store it in the fridge in an airtight container lined with baking / parchment paper. I suggest placing a piece of baking / parchment paper between layers as well, to prevent the pieces of fudge from potentially sticking to each other.
No-cook Almond Marzipan Recipe – an easy addition to your Christmas platter

How do they both compare? Well I found that the cashewnut marzipan is lighter while the almond one is a little on the denser side. That being said, the almond version is super delicious. I think even more than the cashewnut one. Then, there’s also the fact that the almond one is a no-cook recipe. So, to sum up, I will still make my cashewnut version as it is a little easier to work with, but the almond one will be absolutely perfect to use in so many different ways. I’d love for you to try it out and tell me what you think of it.

No-cook Almond Marzipan Recipe
Course: DessertDifficulty: Easy250
grams30
minutesThis delicious no-cook almond marzipan recipe is the perfect easy alternative to the cooked variant. Use it in desserts on your Christmas platter or any way you desire.
Ingredients
1 cup raw, natural almonds
1/2 cup icing sugar
1/2 tsp rose water (you can add a little more if needed)
1/2 tsp almond extract (you can add a little more if needed)
Directions
- Place the almonds in a heatproof bowl.
Pour water from a recently boiled kettle over the almonds to cover the nuts. Leave the almonds to soak for a couple of minutes. - Drain the almonds and peel them. Place them on some kitchen paper or a clean kitchen towel to dry up. Let the almonds cool down completely.
- In a high powered blender / food processor, blitz the almonds to a fine powder.
- Place the almond powder in a large bowl. Add in the icing sugar. Mix it thoroughly till combined.
- Add the rose water and almond extract and knead to form a dough / log.
Your marzipan is now ready to be used.
Recipe Video
Notes
- If you don’t need to use it immediately, you can wrap it in cling film and refrigerate till needed. It keeps for a couple of months. (Personally, I would just make this when needed, probably a couple of days ahead.)
- This marzipan is not a very sweet version. When the marzipan is formed, taste some of it. If you want it sweeter, simply add some more icing sugar and knead it in.
My favourite Marzipan recipe
This version of marzipan is made using cashew seeds and is shaped into little colorful bites. It is the crowning glory of every Indian Christmas platter.


My favourite Marzipan recipe
Course: DessertCuisine: GoanDifficulty: Medium250
grams15
minutes15
minutes20
minutesThis version of marzipan is made using cashew seeds and is shaped into little colorful bites. It is the crowning glory of every Indian Christmas platter.
Ingredients
125g Cashew Nuts
200g Sugar
1 egg white
1/2 tsp Almond essence
1/4 cup water
Food colours, as required
Directions
- Soak the cashew nuts in some (room temperature) water for about 10 minutes. Drain, run some fresh water through the nuts, and drain them again.
- Grind the cashew nuts, egg white and water to a fine paste.
- Pour the ground paste, the almond essence and sugar into a large heavy pan. Place the pan on low-medium heat and stir to combine.
- Cook the paste on a medium low heat, stirring continuously till it thickens and starts coming away from the pan.
- Use the water test to check if the Marzipan is ready. Place some ice cold water in a small bowl and drop a 1/2 teaspoon of the sweet on it. If it firms up on cooling it is done. If it is still soft or too sticky, it needs more cooking.
- As soon as it has cooked, pour the marzipan on a large plate and spread it out a little and leave it to cool down a little. Knead it to a dough while it is still warm.
- Portion and colour the marzipan as desired.
- You can now shape the marzipan as needed or use it in any recipe that calls for it.
- If you making little shapes with the marzipan, once you de-mould it, place it on a plate and leave it to air dry for a while till it sets and is slightly firm to the touch. You can then place it in an airtight container and store. This should last you a couple of weeks if stored well.
- If the temperature is too high where you are, consider refrigerating it till needed.
Enjoy!!!
Recipe Video
Notes
- Cooking times can vary greatly. This depends on the size and thickness of the vessel used to cook the marzipan, the heat level used during the cooking process and the quantity being made. Please refer to the video, for my recommended water-test to check if your marzipan is ready.
- The prep and cook time does not include the time required for this to cool down and mould into shapes. This time depends on your climate and the designs you are working with.
- These marzipan can be served immediately after shaping. To store, please allow a couple of hours for the pieces to set after they are taken out of the moulds.
Chocolate Hazelnut Fudge

Most Goan Sweet recipes are a labor of love and usually require either hours of stirring on the stovetop or take hours to shape and form. And while I love them all and make most of them every year, I love having recipes like this Chocolate Hazelnut Fudge on hand. This recipe is a great one to have on hand. It uses just 4 ingredients and the cooking time is just a few minutes. And, after leaving it to set in the fridge for a few hours, you end up with a super delicious, decadent chocolate fudge. This time around, I’m using hazelnuts in the fudge and I’m happy to report that this fudge tastes very similar to the Ferrero Rocher chocolates you find in the shops, albeit, without the wafer. You can customize this fudge to suit your liking by swapping hazelnuts for any nuts that you prefer.

Chocolate Hazelnut Fudge
Course: DessertCuisine: AmericanDifficulty: Easy64
pieces5
minutes5
minutes8
hoursThis utterly delicious Chocolate fudge is so simple to make, it will make the cut to your Christmas platter every year. Its perfect for a little sweet treat any time of the year.
Ingredients
350g dark chocolate
100g hazelnuts
1 tin condensed milk (we get 395g tins here)
30g butter
Directions
- Line a 9 inch square baking tray with some foil, leaving a little overhang on the sides and set aside.
- Lightly roast the hazelnuts. Carefully remove any pieces of skin / peel that may have been left on. Let the nuts cool down completely.
- Roughly chop the nuts or place them in a ziplock back and crush the nuts with a rolling pin. You will be left with a rough chop.
- Add the butter, condensed milk and chocolate pieces to a heavy bottomed pan. Stir over medium heat till the chocolate has melted and everything in the pan has combined to form a rich, luscious mix.
- Add the hazelnuts and stir through to incorporate well. You will notice the mix starting to thicken.
Quickly pour into the foil lined tray. Leave it on the countertop to cool down a little. - Once it comes to room temperature, pop the tray into the fridge and leave it to set for 4-6 hours or overnight.
- Carefully peel back the foil. Cut the fudge into squares and serve.
If you’re not serving this up immediately, place in an airtight container and refrigerate till needed.
Enjoy!!!
Recipe Video
Eggless Nankatais – A great biscuit option for Christmas

Let’s talk about the dough for a bit. It is such a ridiculously simple recipe, you will be surprised at how tasty the nankatais turn out. I find that this dough can be a little finicky and it usually works beautifully on a slightly warm day. While that works beautifully for us in Australia and anyone in the Southern Hemisphere, it could be a challenge in the Northern Hemisphere, where its the middle of winter. If its cold where you are, you might find that the dough ends up a little crumbly and you may have a little difficulty shaping it into a cookie. When that happens, I pop the dough in an ovensafe bowl and pop it into a slightly warm oven (about 100 degrees) for a couple of minutes. This helps the ghee warm up and helps bind the dough.

Eggless Nankatais – A great biscuit option for Christmas
Course: CookiesCuisine: IndianDifficulty: Easy30
cookies20
minutes15
minutesThese melt-in-your-mouth biscuits are perfect with a cup of tea and are so good, you can proudly add them to your Christmas platter.
Ingredients
1 1/3 cup all purpose flour
1/3 cup besan (chickpea flour)
1 cup sugar (superfine. You can also powder larger grain sugar and then use it in the recipe)
2/3 cup of ghee (clarified butter)
1/4 tsp baking soda
Directions
- Preheat your oven to 180 deg. Celsius and line a baking tray with some baking / parchment paper.
- Mix the ghee and sugar till it is light and creamy. Scrape down the edges and bottom of the mixing bowl halfway through the process.
- Add the rest of the ingredients (baking soda, all purpose flour and chickpea flour) to the mixing bowl and continue mixing till it forms a dough.
- Shape into little cookies by rolling portions of the dough into a little ball and flatten it slightly. Place the cookies on the lined baking tray.
- Bake for 12-15 minutes or till done. Your looking for a light colour on the edges.
- Take it out of the oven and leave the cookies to cool on the tray itself.
When completely cool, store in an airtight container.
Enjoy!
Recipe Video
Dodol – The quick and easy way
Goa, renowned for its beautiful beaches and people is an idyllic getaway for many. Every school holiday meant a trip to Goa to spend time with family. Along with beautiful weather and some of the most amazing produce, what I enjoy most are the traditional Goan sweets. Since moving from Bombay, these sweets are no longer within easy reach for me. So over the last few years, I’ve done the next best thing – learn to make them myself. A lot of these sweets make an appearance on the Goan Christmas platter also called Kuswar (pronounced koos-wahr). So far, I’ve had brilliant luck with quite a few and I will list them along with links to their recipes at the end of this post. I’m hoping to get a few more of them up earlier this year. So check back soon.
Today, after a long wait, I’m happy to share with you a recipe for Dodol. Dodol is almost a jelly like sweet made using Goa Jaggery, coconut and rice. Traditionally made, it is a very labor intensive recipe, but the results are so worth it. You use coconuts, freshly grated and juice extracted, the rice roasted and ground and after the jaggery is added you cook it long and slow, stirring continuously. Unfortunately for me, I don’t have access to Goa Jaggery in Sydney. But I was told that I could use Molasses instead. So on my last grocery shop, I picked up a bottle of Molasses. I decided I was going to try a few short cuts to cut down on time involved and used rice flour and a can of coconut cream. I’m happy to report that the whole prep and cooking process that usually takes hours, took be about half an hour from start to finish. The hardest part was leaving it overnight to set. You may not need to leave it that long, but I made the dodol in the evening and it was too warm to cut into after dinner.
But when I did cut into it, it was soft and delicious, just like I remember. I would recommend refrigerating it for a while before serving. It cuts a lot easier when cold. So if you’ve been putting of making Dodol because you can’t find jaggery, go get some molasses and get making. When adding the molasses, don’t go by the color of the mix, but taste for sweetness.

Dodol
1 1/2 cup rice flour
1 can (400ml) coconut cream
350-400g molasses
3 tbsp roughly chopped cashew nuts
1 tsp ghee to grease the loaf tin and knife
Water, as needed
Grease a loaf tin with a little ghee and keep aside.
In a large pan (I use the 12″ Kitchenaid Stainless steel skillet) measure out the rice flour. Add enough water and make a batter (almost like a thick pancake batter). I use a whisk for this as it mixes the flour well without any lumps.

Pour in the coconut cream and whisk till dissolved.

Add the molasses and stir.

Now, place the mix on a medium heat and let it cook, stirring continuously.
When it starts thickening, drop the heat to low and continue stirring. I find that you may still find lumps in the mix even inspite of stirring. Use a whisk and break them up. It returns to a smooth consistency very quickly. I had to do this about 3 times.
As it thickens, it gets harder to stir. Add the chopped cashew nuts and keep stirring.
After about 20 minutes, here’s what my mix looked like.

Continue cooking till the mixture starts leaving the sides of pan and looks a little glossy. I cooked the mix down for about another 5 minutes, stirring continuously.
At this stage, you need to work quickly. Pour into the greased loaf tin and flatten it down using the back of a spoon or a spatula.

Leave to set and cool completely. Once it has cooled you can either refrigerate it for later use or demould it to serve. To demould, just place a plate, slightly larger in size than the loaf tin, on top and tip the tin over the plate. A slight shake of the tin and plate should be enough to loosen the dodol and let prop it on the plate.

Slice and serve.

Enjoy!!!
Pin now and try later.

Other Goan sweets and Kuswar –
Perad / Guava Cheese (using canned guavas)
Perad / Guava Cheese (using fresh guavas)
Kulkuls
Coconut Toffee
Milk Cream
Jujups
Baath
Marzipan
Perad or Guava Cheese … made with Canned Guavas
Guava Cheese or Perad is a quintessential Goan sweet that makes an appearance at Christmas time. Its flavourful and lightly chewy like a Guava gummy candy.
It’s beginning to look a lot like Christmas!!!


Drain the guava halves and reserve the syrup.
Now place all the seeds, that were previously scooped out, in a strainer, add a couple of spoons of the reserved syrup from the cans and stir through the strainer to extract all the guava puree from the centres. You may need to do this a couple of times adding a tiny bit of syrup each time to extract all the guava. Add the extract to the pan and now discard the seeds.
I usually end up with about 370g pulp from the halves and about 250g from the centres. In all about 620g of guava pulp. Other recipes call for a lot more sugar, but since these are canned guavas in syrup they are sweeter than the fresh ones, so I’ve cut down on the amount of added sugar in the recipe.
Add the cloves and the sugar to the pan.

Place the pan on medium heat and stir continuously using a wooden spoon with a long handle. The guava mix tends to sputter and spit while cooking and the long handle will prevent the mix splashing on your arms. Make sure that when you stir, the spoon gets to the edges of the pan to prevent it sticking to the bottom of the pan and burning. If the mix sputters too much, lower the the heat and continue cooking.

When the mix thickens, extract the cloves carefully and discard. Continue cooking till it leaves the sides of the pan. Keep stirring.
Test to see if done. (Use water test – Place some icy cold water in a small bowl and drop a teaspoon of the sweet on it. If it firms up on cooling it is done. If it is still very soft or too sticky, it needs more cooking).

When done, pour the mix into the greased pan. Using the back of a large spoon that has been greased with some ghee spread the mix to form an even slab and set aside to cool.

When it has cooled down a bit, using a knife that has been greased with some ghee, cut into cubes. You may need to grease the knife a couple of times while cutting to prevent it sticking.
When it has completely cooled, store in an air tight container. If you are making this ahead of time, or if it summer like in our part of the world, refrigerate till you are ready to use.

Enjoy!!!

Perad – Guava Cheese
Course: DessertCuisine: GoanDifficulty: Medium30
minutes30
minutesGuava Cheese or Perad is a delicious, flavorful candy found in Goan homes
Ingredients
2 cans Guava Halves, in Syrup (each can is 410g)
3-4 cloves
500g sugar
1-2 tsps ghee / clarified butter
Directions
- Place some of the ghee on a large metal cookie sheet / baking pan and spread on the bottom and sides and keep this aside.
- Drain the guava halves and reserve the syrup.
- Scoop out the seeds and set aside.
- Puree the halves till smooth and put the puree in a heavy bottomed vessel. Now Goan sweets are notorious for taking ages to cook, but I have found if you use a wider vessel, its cooks a lot faster because of the increased surface area. So I use a stainless steel 12″ Kitchenaid Skillet for all my sweets and it drastically reduces the cooking time.
- Now place all the seeds, that were previously scooped out, in a strainer, add a couple of spoons of the reserved syrup from the cans and stir through the strainer to extract all the guava puree from the centres. You may need to do this a couple of times adding a tiny bit of syrup each time to extract all the guava. Add the extract to the pan and now discard the seeds.
- I usually end up with about 370g pulp from the halves and about 250g from the centres. In all about 620g of guava pulp. Other recipes call for a lot more sugar, but since these are canned guavas in syrup they are sweeter than the fresh ones, so I’ve cut down on the amount of added sugar in the recipe.
- Add the cloves and the sugar to the pan.
- Place the pan on medium heat and stir continuously using a wooden spoon with a long handle. The guava mix tends to sputter and spit while cooking and the long handle will prevent the mix splashing on your arms. Make sure that when you stir, the spoon gets to the edges of the pan to prevent it sticking to the bottom of the pan and burning. If the mix sputters too much, lower the the heat and continue cooking.
- When the mix thickens, extract the cloves carefully and discard. Continue cooking till it leaves the sides of the pan. Keep stirring.
- Test to see if done. (Use water test – Place some icy cold water in a small bowl and drop a teaspoon of the sweet on it. If it firms up on cooling it is done. If it is still very soft or too sticky, it needs more cooking).
- When done, pour the mix into the greased pan. Using the back of a large spoon that has been greased with some ghee spread the mix to form an even slab and set aside to cool.
- When it has cooled down a bit, using a knife that has been greased with some ghee, cut into cubes. You may need to grease the knife a couple of times while cutting to prevent it sticking.
- When it has completely cooled, store in an air tight container. If you are making this ahead of time or if it summer like in our part of the world, refrigerate till you are ready to use.
Enjoy!!!
Recipe Video
Notes
- Always use a heavy pan to cook this Guava Cheese. It keeps it from burning easily. If possible, use a wide pan. A wide pan, increases surface area and decreases cooking time.
- Cooking time will vary depending on a number of factors like amount of liquid used, heat level used during cooking, size and thickness of the pan, width of the pan etc. It took me half an hour in total. Like most Goan sweets, its hard to time the cooking process. You need to go by what you see and feel. My step-by-step video will help with this.
Kulkuls – Step by step recipe

As Christmas comes closer, I see so very many posts of Christmas cookies and treats pop up all over the place. A lot of the treats that you now see have evolved over the years. In the last couple of years, I have seen and tried out a few that are brand new to me and I wouldn’t have known of if it wasn’t for the internet. These were so much easier and quicker to make than the kind of Christmas sweets I am used to making, not to mention absolutely delicious. Today, however, I’m going to share with you a Christmas treat that I’ve grown up with, these gorgeous Kulkuls. This is a traditional Goan sweet and if you haven’t had them before these are little deep-fried, sweet, pastry bites.
This sweet called Kulkuls (cuhl-cuhls), is something I’ve grown up with. Every year, at around this time the family would gather to make these little treats. And yes, it is a family affair. This little bites of fried, sweetened pastry take a while to make. Since, many hands make for light work, my Grandma, my Mum, my Father (whenever he was on leave from work), my brother and I would sit down to make these sweets. We’d make a massive batch of this every year and it would take a whole evening from start to finish. That being as it is, we’d make Kulkuls every single year. These little fried dumplings can be sweetened to your liking and they have a long shelf life. The batch that we used to make around this time, would last till the end of Jan. In all honesty, they’d probably keep much longer, but they are so tasty and addictive, they’ll be finished long before that.
Most of my family recipes, the old Goan ones have been handed down from one generation to another. The weird part is almost all of these recipes, never had fixed quantities of ingredients mentioned. The recipe is very forgiving and I’ve managed to chart down some quantities for reference. This quantity is a much more manageable batch size than what I’m used to, but you could cut it down further, if you need to. The process should take a couple of hours but I think its all worth it. While I did manage to get step by step pictures of the process, I didn’t manage to take a picture of the batch after it was done frying. So for the time being, I am putting up a picture of our platter of traditional Goan Christmas sweets from last year which has some kulkuls on it. I”ll try and get a better one this year.
 |
| L-R: Date Rolls, Nankatais, Kulkuls, Chonya Doce, Perad, Milk Cream |
Kulkuls
1/4 kg Semolina (rava)
1/4 kg All purpose flour (maida)
1 egg
A splash of milk
3 tbsp clarified butter (ghee)
1/3 can coconut cream (400ml can) (You could also use about 150 ml freshly extracted coconut juice)
2 fat pinches of salt, or to taste
Superfine (or powdered) sugar, to taste (Start with a couple of heaped tablespoons and add more as needed)
Oil, for deep frying
Knead all the ingredients to a dough using milk as needed.
Kneading the dough once its done, should leave a slight trace of ghee on your hand, but only just. If your dough is on the dry side, add a little more ghee and knead again. This ensures that the dough doesn’t stick to the forms we’re using to shape the kulkuls.
Taste a little pinch of the dough for sweetness. I tend to not make these too sweet so that it cuts through all the other sweetness on the plate. If you think you want the kulkuls sweeter, add some more sugar and knead into the dough.

Cover the dough with a damp cloth and let it rest for about half and hour.
To shape the kulkuls, you can use a variety of things. We now use these paddles that are specifically used for kulkuls. If you don’t have these paddles, you can use the back of a fork or a new, clean haircomb.

Work with a small portion of the dough at a time. Keep the unused dough covered with a damp cloth while you work with the rest. Roll into a long sausage shape and cut into pieces.
Working with one piece at a time, place the piece of dough on the paddle.
Using your thumb, flatten the dough into a rectangular piece as shown in the pictures below.
Starting with the end closest to you, gently life the dough and roll away from you, keeping the roll fairly tight.
Lightly press the edge of the roll to seal it up so that it doesn’t open up while frying.
Adjust the size of the pieces of dough to suit the size of the kulkuls you need.
Repeat with the rest of the dough. As you shape the kulkuls, keep them on a flat tray. I turn a cookie sheet upside down and use the back of the tray.

When they are all done, heat some oil for deep frying.
Test that the oil is hot enough by gently dropping a small bead of dough into the oil. If it bubbles in the oil, instantly and comes to the top, the oil is hot enough.
Keep the oil on medium heat.
Gently tip the kulkuls into the oil. Don’t overcrowd the pan. Fry them in small batches as the oil may froth a little and bubble up and spill over. Start with the ones that were shaped first.
When the kulkuls are golden brown, drain using a slotted spoon and place on some kitchen paper to drain off any excess oil.
Repeat with the rest of the kulkuls until they are all fried up.
When the kulkuls have completely cooled down, store in an airtight container.
Enjoy this lovely addition to your Kuswar platter.
** I’m hoping to get more pictures this year and will add them to this post.
If you’re looking for other Kuswar recipes, you can find them here –
1) Marzipan
2) Date Rolls
3) Nankatais
4) Chaklis
5) Baath / Badca
6) Peraad
7) Coconut Toffee
8) Milk Cream
9) Jujups
10) Coconut Ladoos / Coconut Snowballs

Kulkuls – Step by step recipe
Course: SnacksCuisine: GoanDifficulty: MediumKulkuls – a traditional Goan Christmas sweet. These are little deep-fried, sweet, pastry bites that grace every Indian Christmas platter.
Ingredients
1/4 kg Semolina (rava)
1/4 kg All purpose flour (maida)
1 egg
A splash of milk
3 tbsp clarified butter (ghee)
1/3 can coconut cream (400ml can) (You could also use about 150 ml freshly extracted coconut juice)
2 fat pinches of salt, or to taste
Superfine (or powdered) sugar, to taste (Start with a couple of heaped tablespoons and add more as needed)
Oil, for deep frying
Directions
- Knead all the ingredients to a dough using milk as needed.
- Kneading the dough once its done, should leave a slight trace of ghee on your hand, but only just. If your dough is on the dry side, add a little more ghee and knead again. This ensures that the dough doesn’t stick to the forms we’re using to shape the kulkuls.
- Taste a little pinch of the dough for sweetness. I tend to not make these too sweet so that it cuts through all the other sweetness on the plate. If you think you want the kulkuls sweeter, add some more sugar and knead into the dough.
- Cover the dough with a damp cloth and let it rest for about half and hour.
- Work with a small portion of the dough at a time. Keep the unused dough covered with a damp cloth while you work with the rest. Roll into a long sausage shape and cut into pieces. Working with one piece at a time, place the piece of dough on the paddle. Using your thumb, flatten the dough into a rectangular piece. Starting with the end closest to you, gently life the dough and roll away from you, keeping the roll fairly tight. Lightly press the edge of the roll to seal it up so that it doesn’t open up while frying. Adjust the size of the pieces of dough to suit the size of the kulkuls you need.
- Repeat with the rest of the dough. As you shape the kulkuls, keep them on a flat tray. I turn a cookie sheet upside down and use the back of the tray.
- When they are all done, heat some oil for deep frying.
- Test that the oil is hot enough by gently dropping a small bead of dough into the oil. If it bubbles in the oil, instantly and comes to the top, the oil is hot enough. Keep the oil on medium heat.
- Gently tip the kulkuls into the oil. Don’t overcrowd the pan. Fry them in small batches as the oil may froth a little and bubble up and spill over. Start with the ones that were shaped first.
- When the kulkuls are golden brown, drain using a slotted spoon and place on some kitchen paper to drain off any excess oil.
- Repeat with the rest of the kulkuls until they are all fried up.
- When the kulkuls have completely cooled down, store in an airtight container.
Recipe Video
Christmas Broken Glass Jello


Leave to set in the refrigerator till firm. I left mine about 8 hours. You may be able to cut into this sooner, but make sure that the Jelly has set firm before you cut it up. This dish can be made ahead of time. So plan for about 8 hours to set at this stage.
