
A good, rich, dark and sometimes boozy Christmas Fruit Cake is a must-have on every Christmas platter. Studded with dry fruit soaked in rum and spiced with beautiful holiday flavours, this recipe is sure to win you over.

In most Christian homes along the south west coast of India, a good Dark Fruit cake makes an appearance at Christmas and all special occasions like engagement parties, weddings, anniversaries, Communion celebrations and so on. It also holds a very prominent spot on a typical Christmas platter, or what is locally referred to as a Kuswar platter. (Kuswar=Christmas sweets)
Most people I know enjoy a good fruit cake, but very often, find it too tedious to make one at home. They settle for a commercially made cake, which very often has a number of additives including caramel colour to give it a deep, dark colour.
Today, I’m sharing with you, my favourite Fruit Cake recipe. This recipe is a little longer than most other cake recipes. However, I can assure you it is a fairly simple process and the end result is so good, it’s well worth all the extra effort. To help make the process easier, I’ve broken this recipe down into a few parts. Some of them can actually be done days before you’d like to bake this cake. The best part is, this cake tastes best if it’s allowed to rest for a couple of days, so it’s a perfect one to make ahead.
Step 1 – Soaking the fruit
This recipe calls for 500gms of mixed dry fruit. In my assortment, I’ve used raisins, sultanas, currants, mixed peel, candied / glacéd cherries and candied ginger. You can use any dry fruits of your choosing, in the proportion you’d like them. It just needs to add up to about 500 grams all together.

Chop the larger pieces of fruit down to make slicing your finished cake easier. Doing this also makes for a better eating experience, in my opinion. Place all the fruit in an airtight glass jar, top it off with some rum and set it aside in a cool dark place. The fruit needs atleast 24 hours to soak and rehydrate. The longer is steeps in the rum, the better the results. This can be done upto a year in advance.

Step 2 – Making the caramel
The 2nd step is making the caramel. There are many ways to make a caramel. For this recipe, you’re looking for one that gives you a slightly more fluid consistency. I’m using a 2:1 ratio – 2 parts sugar to one part water and I find that this gives me the perfect results for this recipe. You can make this caramel even a few days before you want to bake your cake. Simply let it cool down completely and store in an airtight glass jar. If you’re making this the caramel, the day that you’re baking the fruit cake, make sure the caramel has cooled down completely before you add it to the batter.

Step 3 – Making the cake
Making the batter is a very simple process. It’s just like making any other cake. You need to ensure all your ingredients are at room temperature. In this recipe, I’m using dark brown sugar to help lend a darker colour to the cake. If you can’t find dark brown sugar, regular white sugar will work too. Just make sure you use a fine grain sugar or simply powder your regular white sugar before adding it to the batter.
Sometimes, you find that the fruit in a fruit cake like this one isn’t evenly distributed. Mix the fruit into the flour – baking powder mix to ensure that the fruit doesn’t sink to the bottom of the cake.
Also, in this recipe, I’m using treacle to darken my cake and give it an added boost of flavour. If you can’t find treacle, use some molasses instead. I’m not using any artificial colours. A lot of the commercially available dark fruit cakes use caramel colour. If you’d like to, you can add some to the batter.


I’m going to feed this cake only once with some dark rum, just as it comes out of the oven. This will help the cake soak up all the rum.

While you can cut into the cake as soon as it cools dow, for best results, I recommend atleast letting it stand overnight before you cut into it.
Once all the Hard Yakka’s out of the way, sit back and enjoy your stunning Fruit Cake.


Christmas Fruit Cake
Course: Cakes, Cakes, Cookies & Desserts, RecipesDifficulty: Medium1.8
kilos50
minutes45
minutes24
hours (min)This rich, dark and boozy Christmas Fruit Cake is studded with dry fruit and is beautifully spiced to make it the perfect cake for the Holidays.
Ingredients
- For soaking the dry fruit –
100g sultanas
100g raisins
100g currants
100g mixed citrus peel
50g candied / glaced cherries
50g candied ginger
240ml dark rum
- For the caramel –
1 cup sugar
1/2 cup hot water, from a recently boiled kettle
- For the cake –
200g butter, at room temperature
200g dark brown sugar
4 eggs
1 tsp Vanilla bean paste / vanilla extract
2 tbsp Treacle
120ml Caramel (recipe included)
Zest and juice of 1 orange
250g all purpose flour
1 tsp baking powder
1 tsp ground cinnamon
1/2 tsp ground ginger
1/4 tsp ground nutmeg
1/8 tsp ground cloves
Dry fruit, previously soaked as per directions below.
50g cashew nuts, chopped
45ml dark rum
Directions
- Soaking the fruit –
- Chop all the dry fruit into smaller pieces. I try and keep them evenly sized, like the size of the currants, which are the smallest in the assortment.
- Place all the chopped fruit in an airtight glass jar. Top with rum. Mix well. Cover and steep for a minimum of 24 hours in a cool, dry place. You can leave this fruit to steep for upto a year. Shake the jar or stir the ingredients every once in a while.
- For the caramel –
- Place 1 cup sugar in a large vessel. Let it melt and caramelise on medium heat till all the sugar has dissolved. Do not stir the sugar. Swirl the pan, as needed.
- Once all the sugar has completely dissolved and it caramelised, pour 1/2 cup hot water down the side of the vessel. It is important to do it in this manner to prevent the caramel splashing on you.
- Let it heat through for about another 10 seconds or till both liquids have mixed well. Give it a light stir to ensure they have mixed through.
- Set this aside and leave to cool completely before adding to the cake batter.
- If you’re making the caramel ahead of time, after is had completely cooled, store in an airtight glass jar in a cool, dry place.
- To make the cake –
- Mix the flour and baking powder in a bowl to combine well.
- In a larger bowl, place the soaked dry fruit after draining out any excess rum. Do not discard this rum. You can top the jar up with more fruit and rum and leave to steep for the next time you make this cake.
- Add the cashewnuts to the fruit and mix well.
- Add the flour and baking powder mix to the bowl and mix the flour and fruit thoroughly, and stir through to break up any larger clumps of fruit.
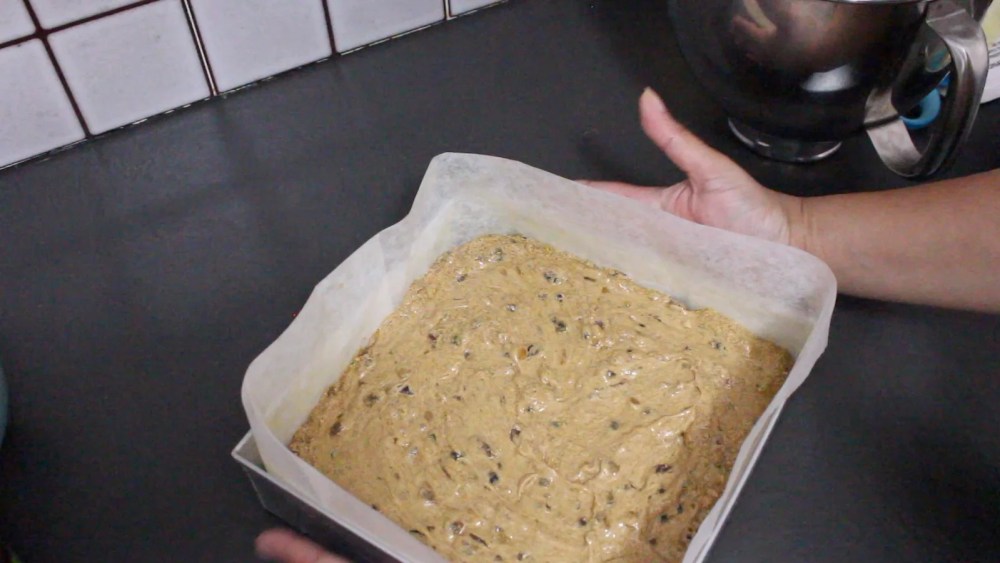
- Preheat your oven to 170C and line a 9 inch square cake tin with baking paper and grease it.
- In the bowl of your stand mixer, place the butter and brown sugar and beat till it is light and creamy and all the sugar has dissolved.
- Add the eggs, one at a time, mixing between each addition.
- Add the vanilla, orange zest and juice, caramel, treacle and all the ground spice powders. Mix well till combined.
- Lastly, add the fruit – flour mix and fold it into the cake batter.
- Bake for 40-45 minutes or till done.
- Immediately, pour the rum all over the top surface of the cake.
- Let the cake cool down in the cake pan itself.
- When it has completely cooled, it is ready to serve or store. For best results, let it rest overnight before cutting. Store carefully wrapped in a couple of layers of baking paper.
- When you’re ready to serve, cut into slices or bars and enjoy!
Recipe Video
Notes
- Make sure all ingredients are at room temperature.
- The fruit should be soaked for a minimum of 24 hours or upto one year in an airtight glass jar. The longer they steep, the better.
- Make sure the caramel has cooled down completely before adding to the batter. The caramel can be made a few days ahead. Simply let it cool down completely and store in an airtight glass jar till ready to use.
- For best results, let the cake rest atleast overnight before cutting into it.
Rose Cookies – Kokkisan
With Christmas fast approaching, today I thought I’d share with you a recipe for Rose Cookies. Rose Cookies, Kokkisan or Achu Murukku – these are a few names these little treats go by in different parts of the South of India. If you’ve not had these before, imagine amazingly crisp, deep-fried, sweet cookies. They are so more-ish. Which is why it’s a good thing this batch yields quite a few cookies.

Let’s move on to the cookies themselves, shall we? While they’re not difficult to make, the batter can be very temperamental and finicky. This is one Kuswar treat I personally find the most trying. The most important part of this recipe is the batter. It takes a little patience and tweaking to get it to just the right consistency. But boy, once you do, churning these cookies out is a breeze.
The batter –
Are you ready to give these a try. Let me walk you though the process. Putting the batter together initially is a very simple process and it just a matter of whisking all of the ingredients together. The one thing you need to watch out for, is the amount of liquid that goes into it. You’re looking for a batter that isn’t too thick or too thin. It’s a Goldilocks kinda situation; you have to get it just right. A huge saving grace is that the batter is forgiving and can be easily fixed.

If its too thick, it wont cling to the cookie iron at all. When this happens, gradually add small amounts of coconut milk (if you’re out of coconut milk, you can use water) and whisk it in. On the other hand, if its too thin, it’ll stick to the iron and won’t release into the oil, even after you try to separate it using a fork or a skewer. To fix this, simply add a little all purpose flour to the batter, a little at a time and whisk it through and try frying it again.
The frying process –
Now that you have you’re batter sorted out, you need to keep a few things in mind while frying these cookies. Once the oil heats up, maintain it by using a medium to medium low heat. If the oil is too hot, the cookies will brown too quickly. The cookie iron needs to be heated well for it to release the cookies into the oil. The first few cookies are like a tester batch. You may have to sacrifice a couple of them while you figure out the right consistency.

Take the cookies out of the oil when they’re a little lighter than you’d like it. They tend to darken as they cool.

With these pointers in mind, you are now equipped to make a beautiful batch of these Rose Cookies.

Rose Cookies
Course: SnacksCuisine: IndianDifficulty: Difficult500
grams (approx.)10
minutes1
hourRose Cookies are amazingly crisp, deep-fried, sweet cookies that make an appearance on a lot of Christmas Kuswar platters. They are so addictive, they can be enjoyed any time of the year.
Ingredients
1 egg, at room temperature
1/3 cup of sugar (fine grain or ground to a powder)
1 cup all purpose flour
1 cup rice flour, fine
1 tsp Vanilla extract / Vanilla bean paste
1 – 1 1/2 cup coconut milk
A pinch of salt
1 tsp black sesame seeds
Oil, for deep frying
Directions
- To make the batter –
- Crack the egg into a large mixing bowl. Whisk lightly.
- Add the sugar and whisk to combine.
- Add the salt and vanilla and mix.
- Add the all purpose flour and rice flour and mix lightly.
- Add the coconut milk and whisk to form a batter. The batter shouldn’t be too thick or too thin. Use more coconut milk/water or all purpose flour to adjust the consistency as needed.
- Stir in the sesame seeds.
- To fry the cookies –
- Heat the oil in a deep, heavy pan for deep frying.
- Place the cookie iron in the hot oil for about 30 seconds or till it has heated.
- Shake excess oil off the iron and insert in batter about 3/4 of the way. Immediately place the iron in the oil. In a few seconds, lightly shake the iron to release the cookie or use a fork to help take it off the iron. Please watch the video to see the technique in action.
- When the cookie has lightly browned, carefully flip over to fry it on the other side. When golden brown, drain any excess oil and remove the cookies onto a tray lined with absorbent kitchen paper to drain the excess oil. Take the cookies out of the oil when it is still on the lighter side. They will continue to turn slightly darker once taken out of the oil.
- Continue frying the rest of the cookies.
- When the cookies have cooled down completely, serve up or store in an airtight container.
Enjoy!
Recipe Video
Notes
- The consistency of the batter is very important. You may need to adjust the consistency of the batter as you fry the first few cookies to hit the right consistency. If it is too thick, add a little water or coconut milk and whisk in. If it is too thin, add a little all purpose flour and whisk through.
- We don’t like our sweets overly sweet. Feel free to add more sugar to suit your preferences. Fry off a couple of cookies and taste them, adjust sweetness, if needed.
- Take the cookies out of the oil when it is still on the lighter side. They will continue to turn slightly darker once taken out of the oil.
If you’re looking for more Kuswar recipes to make this Christmas, here are a few of my favorite recipes you might enjoy too –
1) Kulkuls
2) Date Rolls
3) Baath / Badca
4) Coconut Toffee
5) Milk Cream
6) Coconut Ladoos
7) Guava Cheese / Perad
8) Nankatais (Eggless)
9) Marzipan (Eggless)
10) No-cook Almond Marzipan
11) Marzipan – My favorite recipe
12) Chocolate Hazelnut Fudge
13) Chana Doce
Gingerbread Fudge – a quick and easy recipe

Today’s Gingerbread Fudge is a great recipe to have on hand for Christmas. It is quick and easy, and results in a creamy fudge that is beautifully spiced with all the Christmas flavours. So if a combination of white chocolate and the flavours of a traditional gingerbread is your thing, stick around for the recipe.
With Christmas fast approaching, a lot of folks have started with all kinds of prep work. From deep cleaning and decorating their homes, shopping for the Holiday season and planning their social calendars, most houses see frenzied levels of activity at this time of the year. It’s because of this, one needs to have a few easy and delicious recipes to fall back on.
This gingerbread fudge recipe ticks all those boxes. With prep and cook time of mere minutes, the hardest part of this recipe is leaving the fudge alone, to cool and set. Sounds perfect, right? Well, it is. And you’re left with a nice batch of fudge that just melts in your mouth.
And if you’re in the Southern Hemisphere like I am, we’re headed straight for summer. And it gets really hot here in Sydney. So while everyone in the North is baking up a storm, these kind of recipes work out perfectly for us. This way we get to enjoy those beautiful flavours of Christmas without having to turn the oven on.
This fudge can be made a few days ahead. Store it in the fridge in an airtight container lined with baking / parchment paper. I suggest placing a piece of baking / parchment paper between layers as well, to prevent the pieces of fudge from potentially sticking to each other.
Now, if dark chocolate is more your thing, check out my Dark Chocolate and Hazelnut Fudge recipe. It is absolutely divine.
The ingredients –
This list is an easy one to get a hold off. You will need condensed milk, white chocolate, vanilla, molasses, ground spices (ginger, cinnamon, cloves and nutmeg) and don’t forget the butter.


Let’s get cooking –
Line a 9×9 inch cake pan with some foil, leaving a little overhang to help take the fudge out once it has set. Set this aside to use later.
Place the condensed milk and butter in a heavy bottomed pan on a medium low heat.
Add the molasses and vanilla. Mix through and add the white chocolate. Stir well to help the chocolate pieces melt.
Next, add the spice powders and stir well to incorporate.
Once all the chocolate has melted and the spice powders have been incorporated thoroughly, pour out onto the lined cake pan. Tap the pan gently a couple of times to get rid of any air bubbles.
Leave it on the kitchen counter and let it come to room temperature.
Refrigerate for 4-6 hours or overnight to set completely.
Cut into squares and serve.


Gingerbread Fudge – a quick and easy recipe
Course: DessertCuisine: AmericanDifficulty: Easy49
pieces5
minutes5
minutes4-6
hoursThis Gingerbread Fudge recipe is quick and easy, and results in a creamy fudge that is beautifully spiced with all the Christmas flavours.
Ingredients
30g butter
1 tin condensed milk (395g)
350g White chocolate
1 tsp Vanilla extract / Vanilla bean paste
1 tbsp Molasses
1 tsp ground ginger (powder)
1 tsp ground cinnamon (powder)
1/8 tsp ground cloves (powder)
1/4 tsp ground nutmeg (powder)
Directions
- Line a 9×9 inch cake pan with foil, leaving a little overhang to help take the fudge out once it has set. Set this aside to use later.
- Place the condensed milk and butter in a heavy bottomed pan on a medium low heat.
- Add the molasses and vanilla. Mix through and add the white chocolate. Stir well to help the chocolate pieces melt.
- Next, add the spice powders and stir well to incorporate.
- Once all the chocolate has melted and the spice powders have been incorporated thoroughly, pour out onto the lined cake pan. Tap the pan gently a couple of times to get rid of any air bubbles.
- Leave it on the kitchen counter and let it come to room temperature.
- Refrigerate for 4-6 hours or overnight to set completely.
- Cut into pieces and serve.
Recipe Video
Notes
- Line the cake pan and assemble your ingredients before you start cooking the fudge.
- If you don’t have access to molasses, you can use a little melted down Goan coconut jaggery.
- Adjust the spice powder amounts to suit your liking.
- Store it in the fridge in an airtight container lined with baking / parchment paper. I suggest placing a piece of baking / parchment paper between layers as well, to prevent the pieces of fudge from potentially sticking to each other.